Unfortunately the Mental Health Charity Workbase where WellArt is currently based is closing permanently on 31st December 2012. Mat and Jo who run WellArt have teamed up with other colleagues and volunteers from Workbase in order to create a new community group called Space2Create. WellArt will continue as part of this new group. As part of this we have set up a new blog to reflect the name changes. Please be patient while we update and get things going! The new blog is at:
www.wellarts2c.blogspot.com
and we can be contacted through S2C via email:
space2createkendal@gmail.com
Thank you for your support.
Mat
Thursday 15 November 2012
Thursday 5 July 2012
The day we were abstract with our masking tape
For this session we had collected some old used canvases from charity shops and given them a quick whitewash with acrylic so that some of the old picture shoed through. Then we used masking tape to create shapes and lines at random, painting over them with different coloured acrylic. We found it best to pull off the acrylicbefore the paint dries.

 When the first layer dried we then used making tape again over the top of what we had done and created another layer. Then another after that. You can keep going as long as you want until you are happy with the result. Warning- have a large bin bag to hand as the masking tape soon mounts up and is covered in paint!


As can be seen above some people also added pieces of fabric too. You could build up additional layers with material or paper, scraps from magazines or anything you fancied. Yoe end up with an abstract mish mash!


As can be seen above some people also added pieces of fabric too. You could build up additional layers with material or paper, scraps from magazines or anything you fancied. Yoe end up with an abstract mish mash!
The day we had a ripping time
In this session we attacked a huge variety of magazines looking for shapes and colours that we could do portraits with. We assembled collages to make the faces, placing some odd images to create the features of peoples faces. Some used loads of different hair to make up the hair of a head nad one individual used only camera related images to make their face. Simply hand ripped out of the magazine to give random edges and glued down with good old PVA, it proved very effective.


Wednesday 30 May 2012
The day we were landscaping
On our visit to the Abott Hall Art Gallery in Kendal some of the group had particularly admired on picture though none of us can remember the artists name! It was a sea view with a town in the foreground. The artists had first created a wash then worked rough blocks of colour to define the various elements. Then they had used pen to draw straight lines to define the outlines of the main shapes and details. They had then worked more in colours to define the detail. The way the wartercolour and pen were built up in layers produced a really effective image that stood out. Of course we had to have a go.


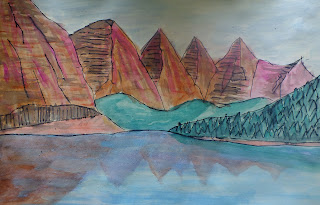 Using watercolours and basing our pictures on photographs we first blocked out the main sections. After this was dry we used marker pens to draw in the main details. Then another layer of colour and finally the finishing touches in pen. Some did more layers than others.


The day we got the maps out
We had been looking at the work of various artists who's work had either been inspired by or had been created on maps. We then set to working on top of maps, some redrawing and others incorporating maps into their pictures. A lot of the group liked theirs so much they took them away so here is a selection of what is left!


Most set to with chalk pastels. If you use a wet paint brush on the chalk after it produces a wash effect and can make the colours stronger. Others used watercolours or acrylic.
Saturday 5 May 2012
The day we visited Abbot Hall Art Gallery
We visited the Abbot Hall Art Gallery in Kendal. The staff were excellent and extremly helpful. I had planned that we would spend some time sketching in the gallery but in the end the group decided they did'nt want to. You can lead a horse to water but you can't make him sketch! The gallery had provided us with pencils, boards and paper if we wanted it.
The various rooms contained a standing collection and a celebration of fifty years of the gallery. This was really interesting reading why individuals had chosen the various pictures. I was really pleased as the visit stimulated great discussion among the group about the pictures, how they were painted, the materials used, the meaning and the composition.
It has fired them up and they now have a long list of things they would like to try and do in the group.
I can highly recommend the gallery for a visit if you are in Kendal.
www.abbothall.org.uk
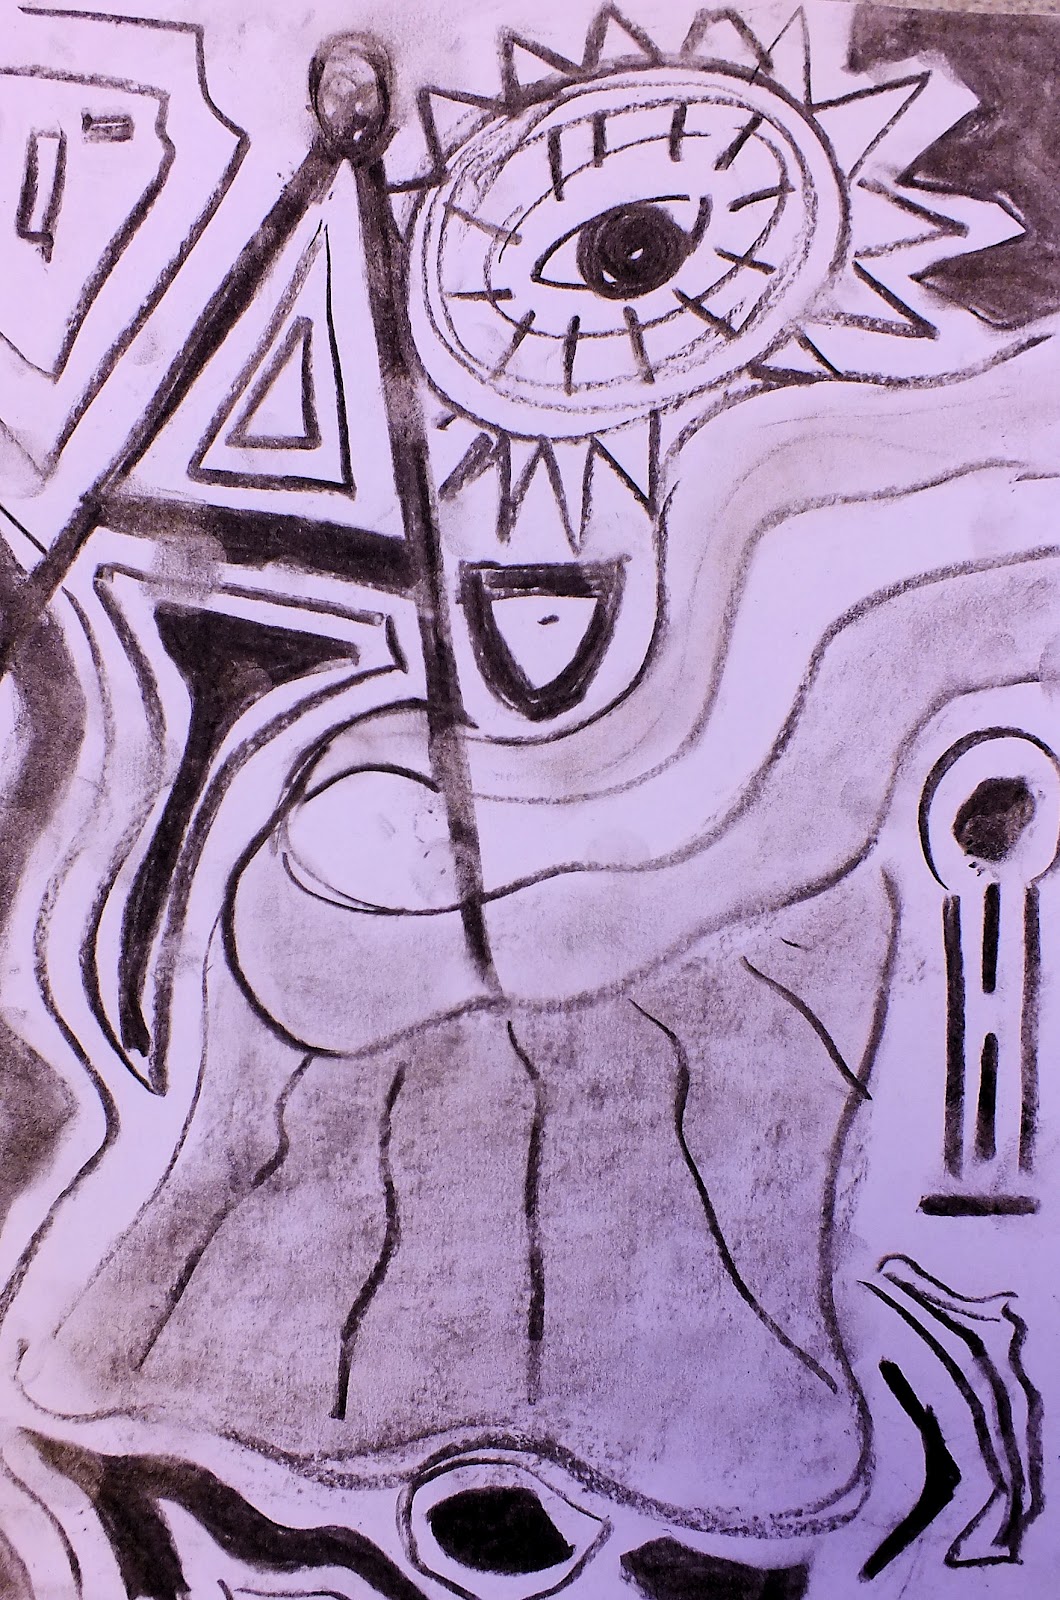
The day we charcoaled
Having worked with ink pens we had a go with charcoal. I encouraged the group to be quite free and easy not worrying about accuracy when trying to sketch each other round the table. We also explored smudging the charcoal to produce shadows.


After a while some of us turned to abstract ideas and began drawing freely from our own ideas just to see what we could do with the charcoal.


Sunday 22 April 2012
The day we pen and inked
Having had a few messy weeks with plaster of paris and marbling we opted for a less chaotic drawing session. We looked at the work of Stephen Wiltshire the autistic artist who draws scenes from memory in pen.
We had a practise to warm up and then set about drawing scenes from guide books or old photographs from the 19th century of buildings. We used disposable fountain pens. Using ink frees you up a bit as you know that if you go wrong you can't rub out. We found that going over lines and adjusting them worked well building up the image using multiple strokes to good effect.


We had a practise to warm up and then set about drawing scenes from guide books or old photographs from the 19th century of buildings. We used disposable fountain pens. Using ink frees you up a bit as you know that if you go wrong you can't rub out. We found that going over lines and adjusting them worked well building up the image using multiple strokes to good effect.


The day we marbelled
Equipment needed,(the things we used)
Marble inks,(acrylic paint will do)
Various sizes and types of paper or card and envelopes.
Aluminium trays the larger the better (turkey size) or even a cat litter tray will do, emptied and cleaned of coarse!
Table covering.
Stirrers, bedstraws sticks cocktail or coffee stirres from a well know coffee café!
Cover table.
Fill tray with water.
Drop generous amounts of ink on top of water ( thin down acrylic paint if using.)
Using a stirrer gently mix the colours (not too much as starts to get muddy)
Gently place paper on top of water ,trying to avoid air pockets lift off and place on newspaper to dry.
We found that we had to keep adding more inks often as the were soon absorbed.
Some of us got so into the activity that clothes and faces were a little bit marked, so be warned! Great fun
We are hopping to try out some origami with some of the marbled paper we created amounts other ideas.


Thursday 5 April 2012
The second day we were inspired by Barbara Hepworth and went a little off track!

After leaving the statues to set for a week we set about removing bumps and cutting new marks and grooves into them using ordinary knives. The plaster of paris is very easy to work apart from a massive amount of dust. We then smoothed the surfaces further using fines sandpaper and finally damp cloths to achieve a nice finish. Then we sealed the surface with a wash of diluted PVA glue. Finally we decorated. Some used marbling, some painted faux marble effects and some used acrylic and scratched patterns into the paint.


Sunday 18 March 2012
The day we were influenced by Barbara Hepworth part 1
One or two of the group had said they fancied trying sculpture of some kind. While looking at the Step Up material provided by Outside In, I had seen a Barbara Hepworth pack. I looked at this and modified slightly the ideas of using plaster to carve into as the people at our group would find proper carving difficult.
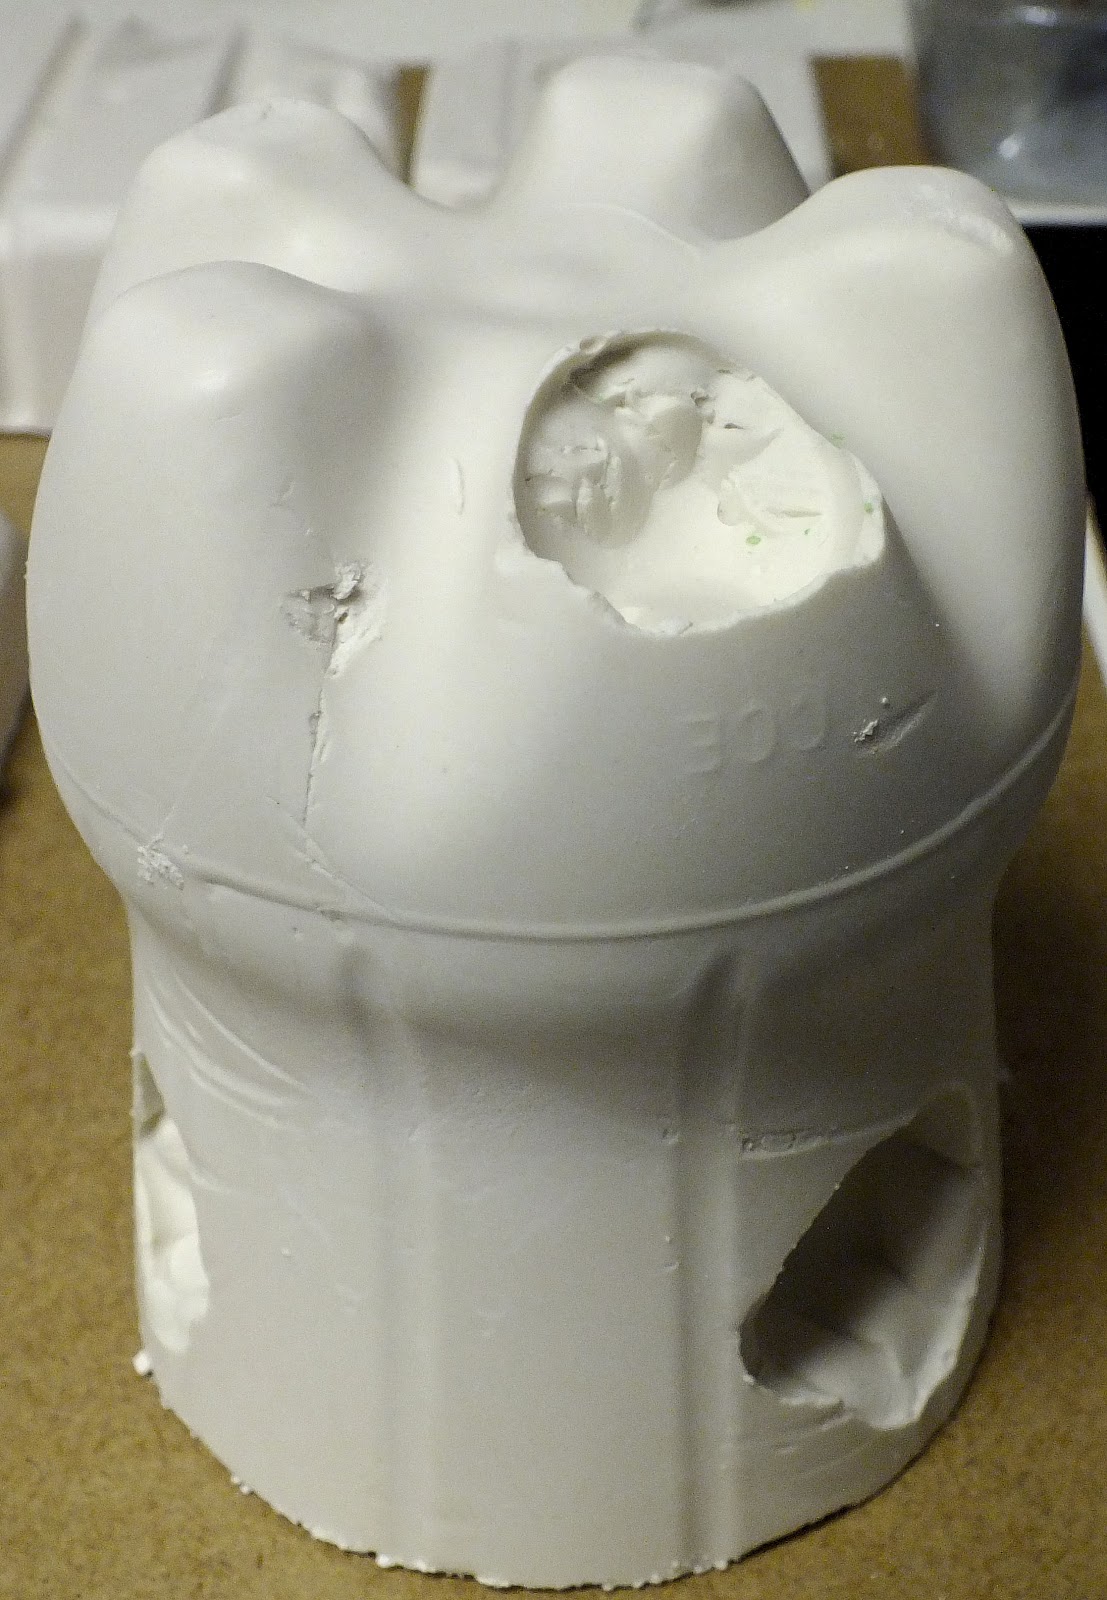
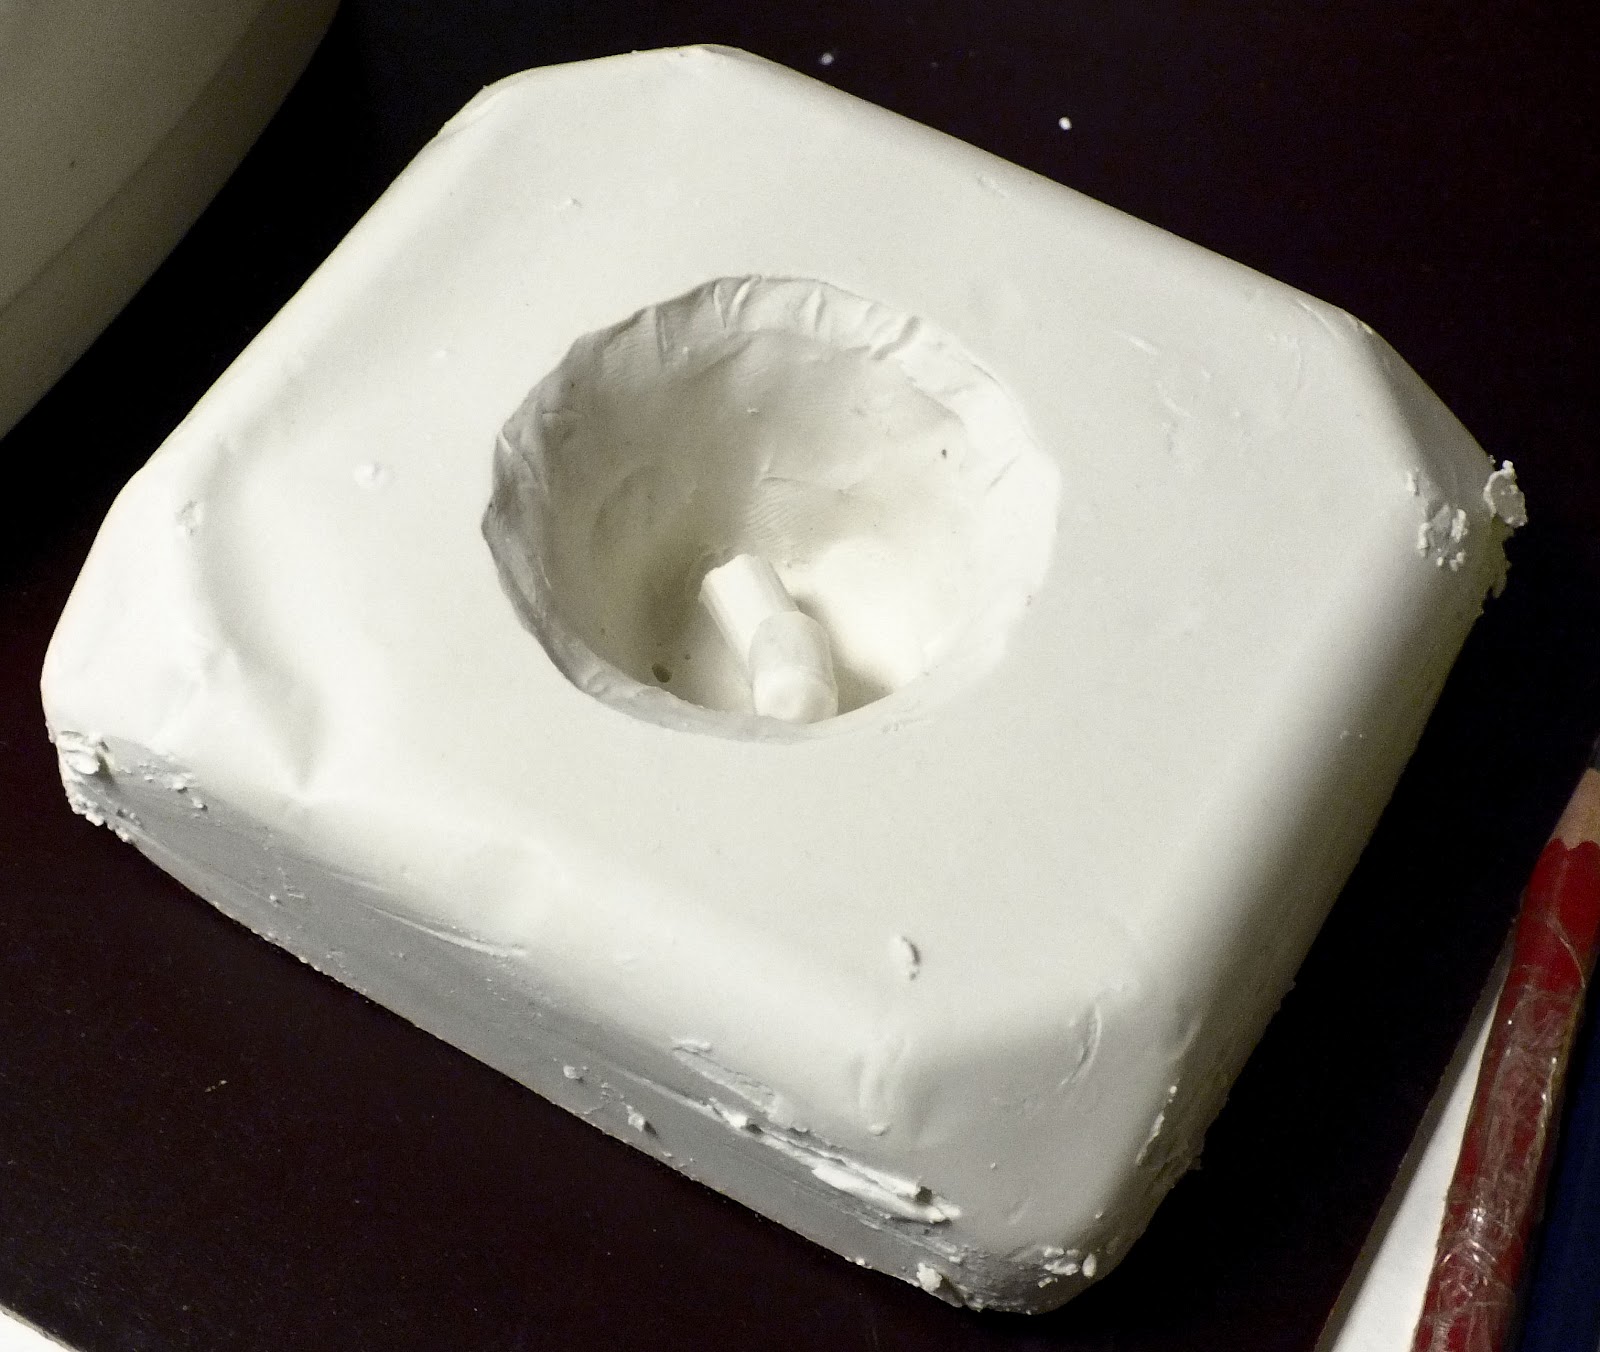
We collected plastic trays, the sort from supermarkets that have fruit and meat in them of different depths and sizes. We then used Plasticine to make shapes on the inside of the trays. Some used cardboard tubes to make large holes through the sculpture, others just put long sausages of Plasticine to make holes.
We then mixed plaster of paris and filled the trays. It took around 20 minutes for the plaster to set enough to take the trays away. Some needed cutting away and others just peeled off. We then removed all the tubes and Plasticine to leave our sculptures.
This is just step one. We are going to leave them a while to fully set then work into them more and smooth off the rough edges but that's for another time!


Subscribe to:
Posts (Atom)